C++面向对象
[toc]
类(Class)
类定义
1 | class className { |
创建对象
1 | class className { |
类访问范围
私有:
1 | class Class1 { |
public & protected

Explore the Istio Service Mesh
1.Explorer Observability
Open the dashboard:
1 |
|
Kiali: default username/password: admin/admin
1.1 Grafana
In the grapana. Home->Istio->Istio Workload Dashboard.

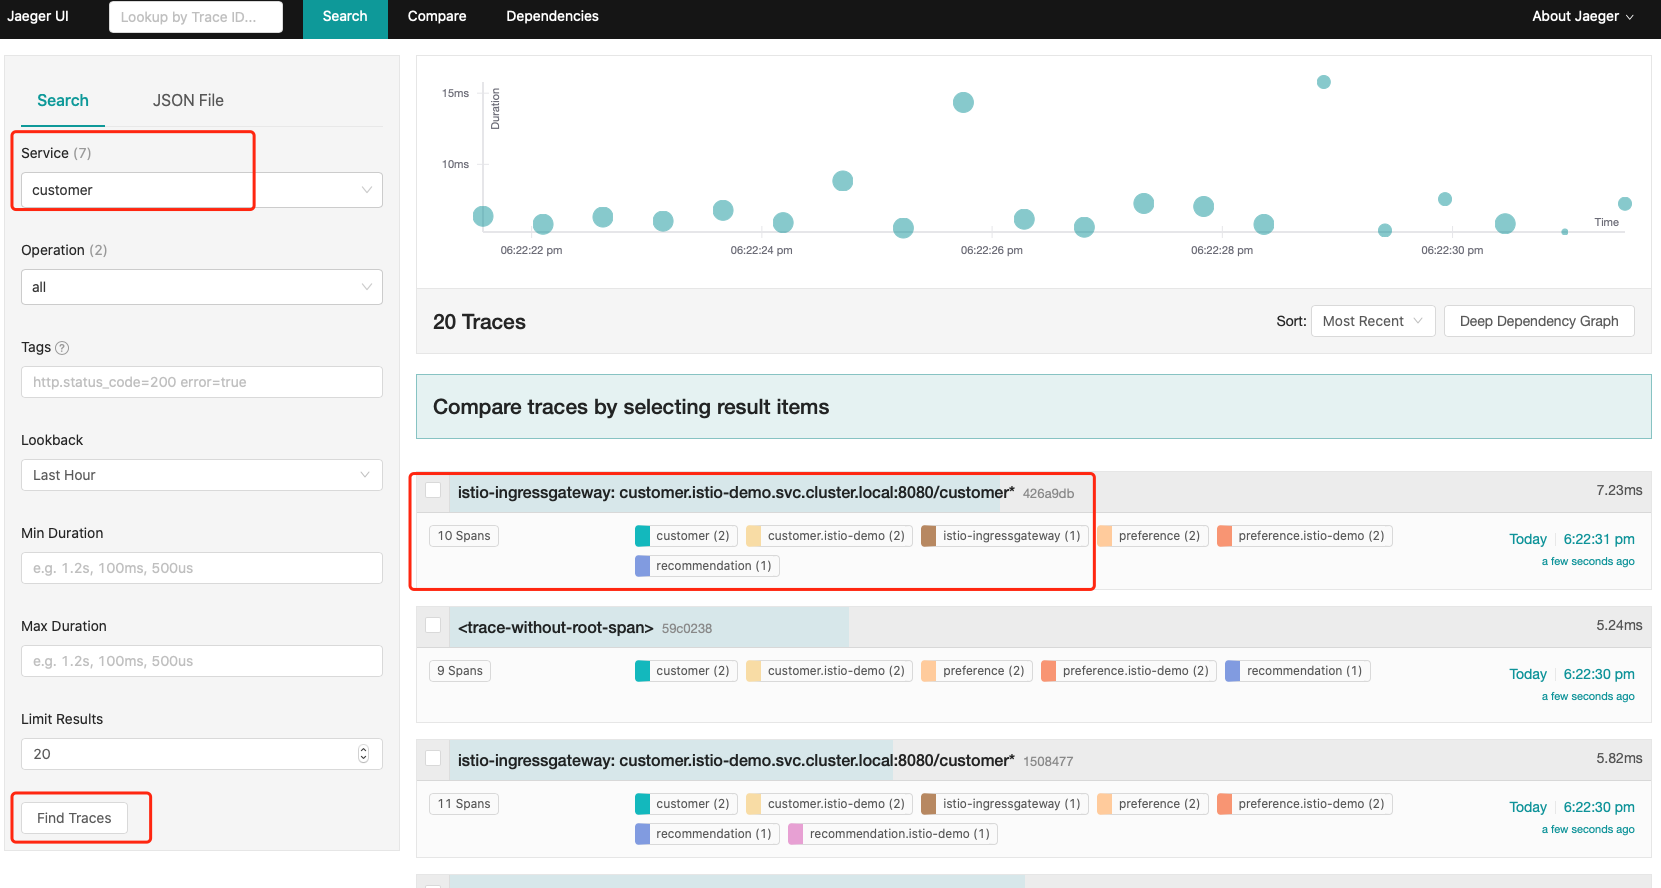
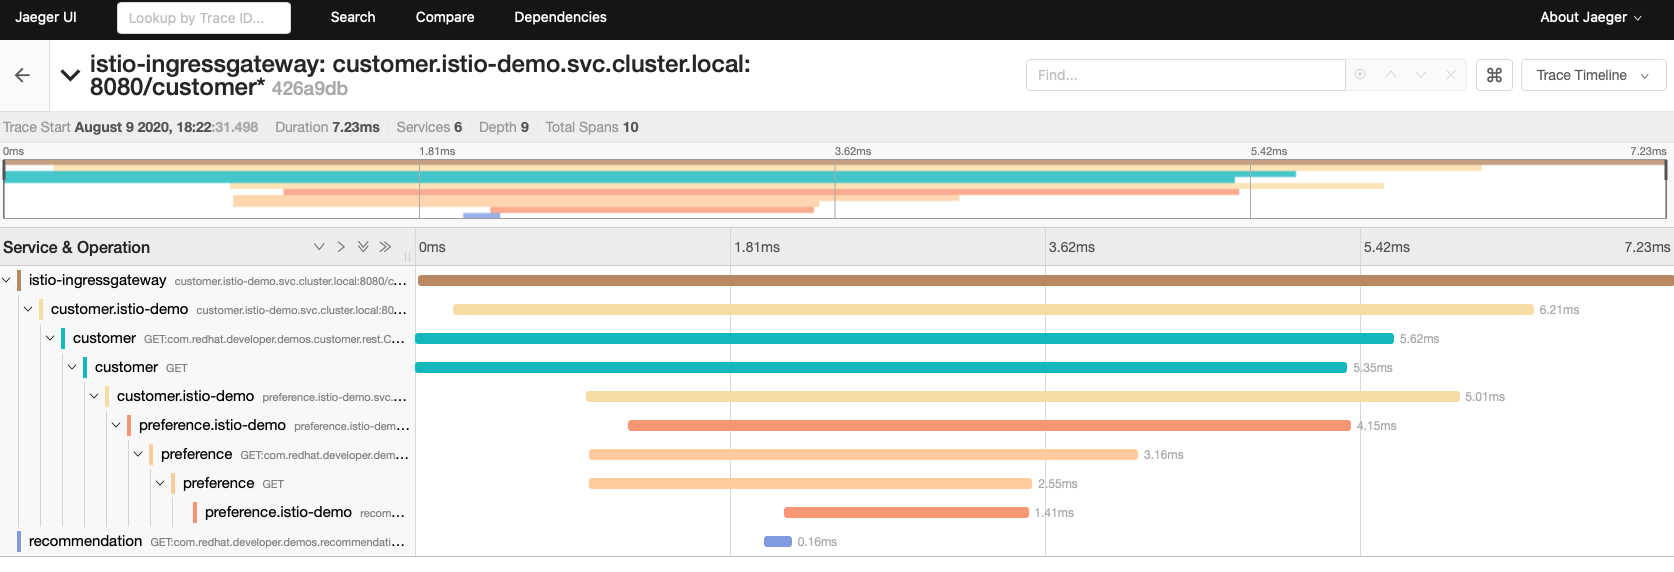
1.2 Jaeger
Extend The Istio Service Mesh
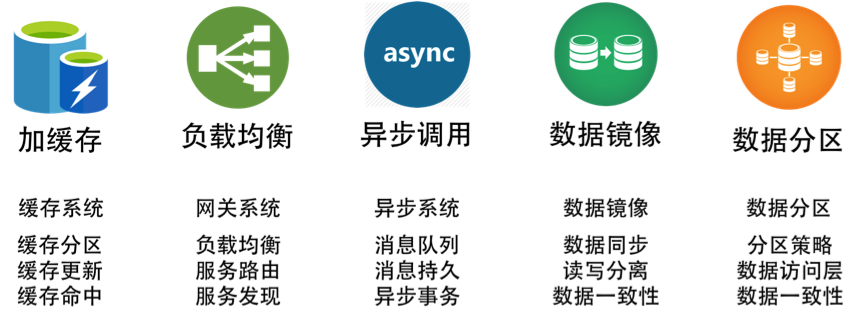
Understand Microservices architecture requirements and challenges
- API
- Discovery
- Invocation
- Elasticity
- Resillience
- Pipeline
- Authentication
- Logging
- Monitoring
- Tracing
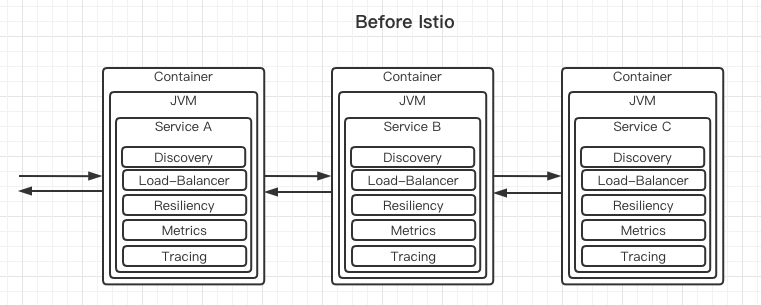
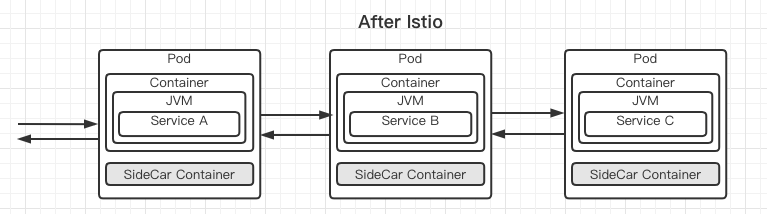
The sidecar intercepts all network traffic.
How to add an Istio-Proxy(sidecar)?
istioctl kube-inject -f NormalDeployment.yaml
or
kubectl label namespace myspace istio-injection=enabled
Extend Your Kubernetes
Discover CustomResourceDefinitions
Custom Resources extend the API
Custom Controllers provide the functionality - continually maintains the desired state - to monitor its state and reconcile the resource to match with the configuration
https://kubernetes.io/docs/concepts/extend-kubernetes/api-extension/custom-resources/
https://kubernetes.io/docs/tasks/access-kubernetes-api/custom-resources/custom-resource-definitions/
Custom Resource Definitions (CRDs) in version 1.7
1 | $ kubectl get crds |
1 | apiVersion: apiextensions.k8s.io/v1beta1 |
Add Pizzas to your Kubernets Cluster
cheese-pizza.yaml
Craft your Apps for Kubernetes
Use Service’s Discovery
Say you have a service mynode in yourspace and a service myapp in myspace. If the myapp wants to access the mynode servcie, the url is:
1 | mynode.yourspace.svc.cluster.local:8000 # 8000 is the service port, not the node port. |
Configure Liveness and Readiness Probes
kubectl scale --replicas=3 deployment xxx
1 | StrategyType: RollingUpdate |
1 | template: |
Once you understand the basics then you can try the advanced demonstration. Where a stateful shopping cart is preserved across a rolling update based on leveraging the readiness probe.
https://github.com/redhat-developer-demos/popular-movie-store
More information on Live & Ready
https://kubernetes.io/docs/tasks/configure-pod-container/configure-liveness-readiness-probes/
Kubernetes Logs, Exec, Resource Constraint, ConfigMap, Secret
logs
1 | kubectl get pods |
exec
1 | kubectl exec -it pod-name /bin/bash |
Constraint CPU & Memory
1 | apiVersion: apps/v1 |
ConfigMap
First Let’s see the environment.
Change the environment on deployment:
1 | kubectl set env deployment/myboot GREETING="hi" |
Building Images & Running Containers
End to End
Find a base image: docker.io, quay.io, gcr.io, registry.redhat.io
Craft your Dockerfile
Configure docker:
eval $(minikube --profile myprofile decoder-env)Build your image:
docker build -t liulx/myimage:v1 .a. Test via:
- `docker run -it -p 8080:8080 --name myboot liulx/myimage:v1`
- `docker run -d -p 8080:8080 --name my boot liulx/myboot:v1`
- `curl $(minikube --profile myprofile ip):8080`
b. If remote repo, do
docker taganddocker pushc.
docker stop containernameto stop testingkubectl apply -f myDeployment.yamlkubectl apply -f myService.yamlExpose a URL via your kubernetes distribution’s load-balancer
docker build
1 | docker build -t something/animagename:tag |
The .indicates where to find the Dockerfile and assets to be included in the build process.
You can alse explicitly identify the Dockerfile:
docker build -t somestring/animagename:tag -f somedirectory/Dockerfile_Production .docker build -t somestring/animagename:tag -f somedirectory/Dockerfile_Testing .docker build -f src/main/docker/Dockerfile.native -t mystuff/myimage:v1 .
Builiding Images
Options Include:
docker buildthenkubectl runorkubectl create -f deploy.yml- Jib - Maven/Gradle plugin by google
- Shift maven plugin by Red hat
- s2i - source to image
- Tekton - pipeline-based image building
- No docker: red hat’s podman, Google’s kaniko, Uber’s makisu
- Buildpacks - similar to Heroku & Cloud Foundry
Kubernetes Environment
Setup
OpenShift is Red Hat’s distribution of Kubernetes
minikube and minishift are essentially equivalent and will be used for the demonstrations/examples below.
Prerequisites
- Docker or
- Podman
- brew install kubectx
- minikube
- kubectl
Downloads
Downloads & Install Kubectl CLI
1 | # MacOS |
Linux & Windows instructions for finding and downloading the a kubectl https://kubernetes.io/docs/tasks/tools/install-kubectl/#install-kubectl
Download & Install Minikube Cluster